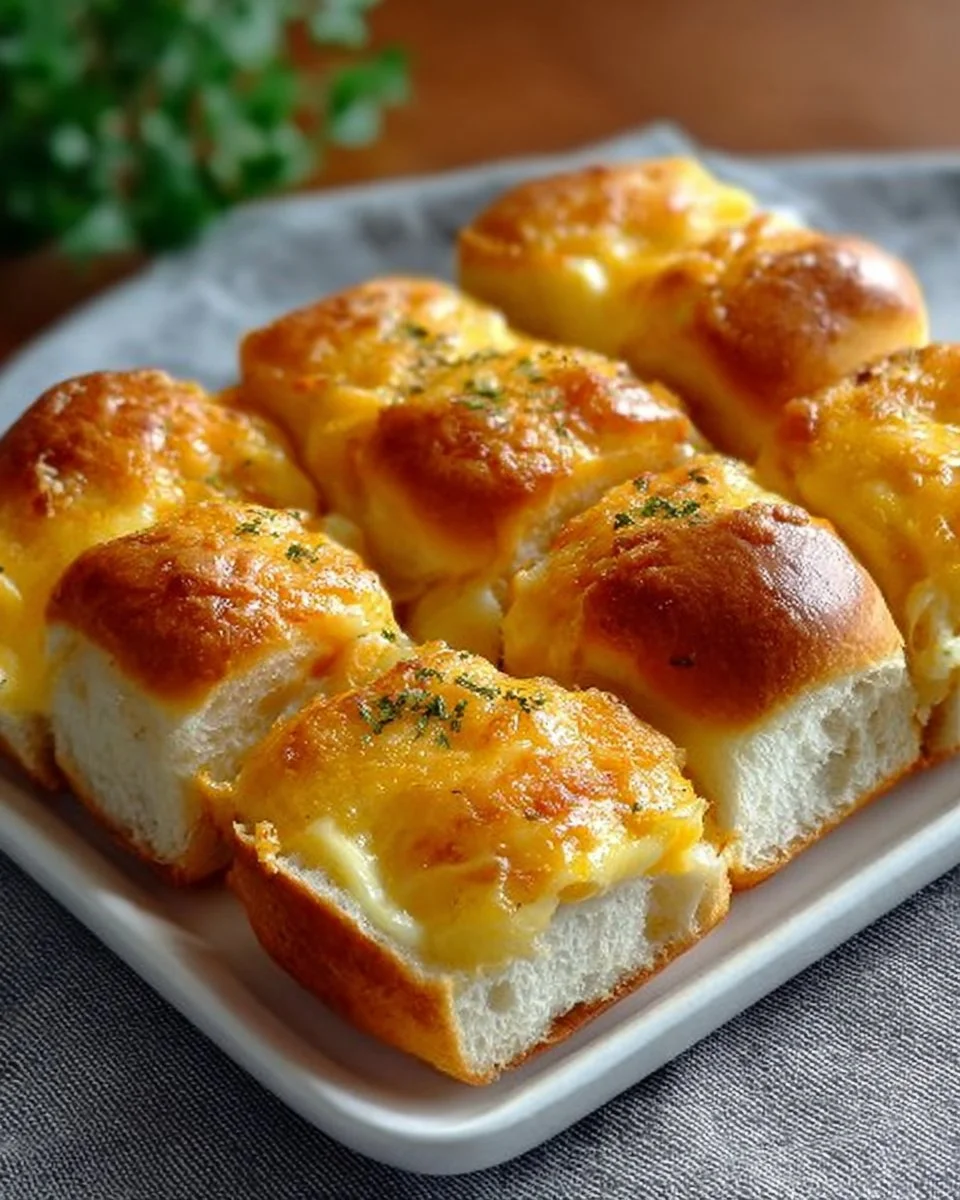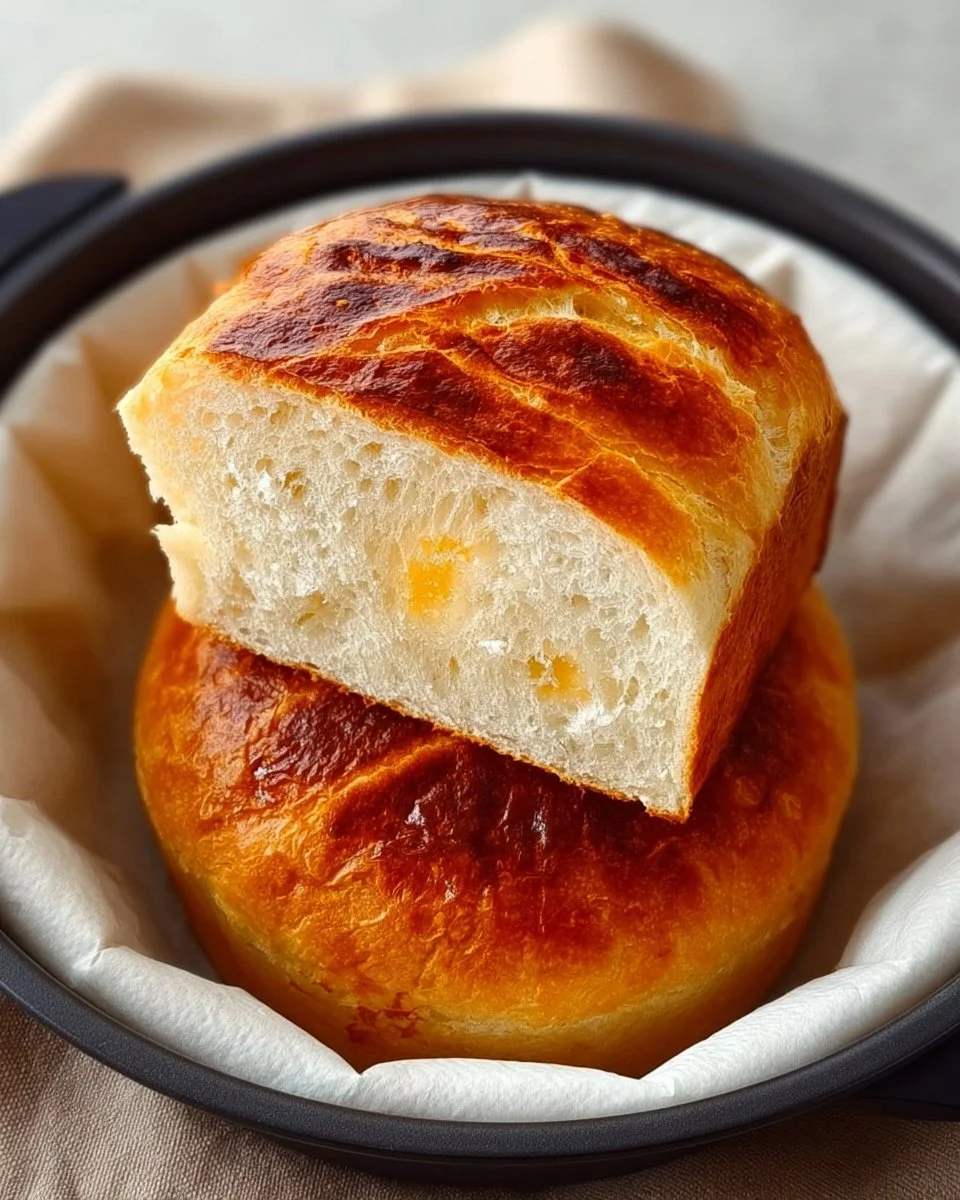
Soft, warm bread fresh from the air fryer fills the kitchen with an inviting aroma that dances through the air. The moment you slice into that golden-brown crust, the steam escapes, bringing forth a tantalizing scent reminiscent of cozy family gatherings and simple, comforting meals. The texture glistens, promising a crunchy exterior that yields to the soft, pillowy interior—a melt-in-your-mouth experience that tempts you to take just one more slice. Topped with a pat of creamy butter or a drizzle of honey, each bite becomes a celebration in your mouth, a warm embrace for the soul.
Imagine pulling a freshly baked loaf from the air fryer, effortlessly achieving a bakery-quality finish without the fuss of a traditional oven. This air fryer bread is not just food; it’s an event—a ritual that transforms any ordinary day into an extraordinary culinary moment. Whether you’re sharing it at breakfast with jam, enjoying it alongside a comforting soup for dinner, or savoring it as a midday snack, the flavors and aromas transport you to a homely kitchen bustling with love and laughter.
Why You’ll Love This Air Fryer Bread
This air fryer bread captivates the heart with its delightful simplicity and unbeatable flavor. It stands out because it embraces the age-old tradition of bread-making while offering the convenience of modern cooking technology. It’s perfect for anyone, even those intimidated by traditional baking methods. The light, airy loaf rises beautifully, creating a crust that crunches pleasingly while revealing a soft fluffy core—which is impossible to resist.
You’ll adore the fairly short preparation time, making it feasible on busy days yet impressive enough for special occasions. Picture serving this stunning loaf at a dinner party, showcasing your baking skills, while it disappears in moments as guests rave about its irresistible aroma and heavenly taste. Simple yet majestic, air fryer bread brings people together over a shared loaf, whether you sit around the breakfast table or gather for a cozy evening meal.
Preparation Phase & Tools to Use
Before embarking on your baking adventure, understanding the essential tools will set you up for success. The air fryer becomes your trusty companion, transforming ordinary ingredients into extraordinary delights. It’s faster than a conventional oven, offering an even cook that ensures every slice burst with flavor.
Having a mixing bowl helps you combine the ingredients seamlessly, ensuring a perfect dough that’s ready to rise. A sturdy spatula or a dough scraper can make kneading the loaf effortless, while a cutting board and a sharp bread knife come in handy for slicing your masterpiece.
Preparation Tips:
- Always measure your ingredients carefully for the best results.
- Set aside 30 minutes for the dough to rise to achieve that perfect texture.
- Preheat your air fryer! This step is crucial for a beautiful golden crust.
Ingredients for Air Fryer Bread
The foundation of this delightful loaf is simple yet transformative. Here’s what you’ll need:
- 2 cups all-purpose flour: This versatile ingredient creates a light, fluffy texture. For a healthier twist, consider using whole wheat flour or gluten-free blends.
- 1 cup warm water: This ingredient activates the yeast, creating the rise. Ensure it’s warm to the touch, not hot, as excessive heat can kill the yeast.
- 2 teaspoons yeast: Yeast is the magic that makes your bread rise! Opt for active dry yeast for the best results.
- 1 teaspoon salt: This enhances the taste and balances the flavors beautifully.
- 1 tablespoon sugar: Sugar feeds the yeast, helping it to flourish, and adds a hint of sweetness.
- 1 tablespoon olive oil: This enriches the dough’s flavor, giving it an appealing softness.
How to Make Air Fryer Bread
-
In a bowl, combine the warm water, yeast, and sugar. Let it sit for about 5-10 minutes until frothy, showcasing the yeast waking up and becoming lively.
-
In a large mixing bowl, combine the flour and salt. Blend them well to ensure an even distribution of flavors.
-
Add the frothy yeast mixture and olive oil to the flour mixture. Stir until a dough forms. Use your hands for the best results, connecting with the dough.
-
Knead the dough for about 5 minutes until it becomes smooth and elastic. The tactile experience is rewarding—feel how the dough transforms!
-
Allow the dough to rest in a warm area for about 30 minutes, letting it double in size. Cover it with a damp cloth to keep it moist.
-
Shape the dough into a loaf, ensuring to tuck the edges underneath for a sleek finish.
-
Preheat your air fryer to 350°F (175°C), setting the stage for crispy perfection.
-
Place the dough in the air fryer basket, ensuring there’s enough space around it for the hot air to circulate. Cook for about 25-30 minutes until golden brown and fragrant.
-
Once done, remove it from the air fryer and let it cool on a wire rack for a few moments. Slicing while warm enhances the texture and aroma.
Chef’s Notes & Helpful Tips
Want to maximize your baking experience? Here are some helpful tips:
- Make-ahead tips: You can prepare the dough a day in advance and refrigerate it after kneading. Just let it come to room temperature before shaping.
- Cooking alternatives: While the air fryer gives fantastic results, you can bake this loaf in a conventional oven at 375°F (190°C) for about 25-30 minutes.
- Customization ideas: Add herbs like rosemary or oregano for an aromatic twist, or mix in grains or seeds before kneading for added texture and flavor.
Common Mistakes to Avoid
Baking bread may seem straightforward, but a few common pitfalls can lead to disappointment. Here’s how to avoid them:
- Not activating the yeast properly: Always ensure that your water is warm but not too hot. Too hot can damage the yeast, while cold won’t activate it.
- Kneading too little or too much: Aim for a smooth and elastic dough. A well-kneaded dough traps air, while over-kneading can lead to a dense loaf.
- Ignoring the dough rising: Patience is key! Allowing the dough to rise properly affects the final texture.
What to Serve With Air Fryer Bread
The beauty of air fryer bread lies in its versatility. Here are some tantalizing pairings:
- Homemade jam: Sweet spreads elevate toasts to gourmet breakfasts.
- Creamy butter: Slather it on warm slices for an irresistible treat.
- Soups and stews: Serve alongside hearty winter recipes for a healthy comfort meal.
- Cheese platters: Pair with your favorite cheeses for a decadent grazing board.
- Garlic herb oil: Dip slices into infused olive oil for a delightful appetizer.
- Salads: Use the bread as a delightful addition to a fresh garden salad, enhancing texture and flavors.
- Pasta dishes: Enjoy it alongside Italian pasta for a flavorful Italian feast.
Storage & Reheating Instructions
To keep your air fryer bread fresh, store it in an airtight container at room temperature. It usually lasts about 3-4 days. If you want to extend its life for several weeks, slice it up and freeze the slices, separating them with parchment paper to prevent sticking.
Reheat in the air fryer for a few minutes to restore that lovely crunch or toast slices for a delightful crispy experience.
Estimated Nutrition Information
While baking bread is a delightful experience, being mindful of nutrition is also important. On average, a slice of this air fryer bread contains about:
- Calories: 120
- Carbohydrates: 22g
- Protein: 3g
- Fats: 1.5g
These values can vary based on ingredient substitutions, so always check calculations if exact nutrition is needed.
FAQs
1. Can I use whole wheat flour?
Yes! Whole wheat flour adds a nutty flavor and fiber, but it may require additional water due to its higher absorbency.
2. What if my dough doesn’t rise?
Ensure your yeast is fresh. If those bubbles aren’t appearing, try again with warm water (not too hot!) and more sugar to feed the yeast.
3. Can I add ingredients like cheese or herbs directly?
Absolutely! Mixing in toppings like shredded cheese, olives, or herbs can elevate the flavors. Just ensure they don’t overload the dough.
4. What can I do with leftovers?
Leftover bread is perfect for croutons, bread pudding, or French toast—delighting your taste buds anew!
5. Is it possible to double the recipe?
Yes, you can make double or triple batches, but make sure it fits comfortably into your air fryer. You may need to adjust cooking times for larger loaves.
Conclusion
This air fryer bread could very well become the star of your baking adventures. With its incredible ease, rich flavor, and gorgeous texture, it invites friends and family to gather, share, and create joyful memories. Whether you’re enjoying it warm right from the fryer or crafting unique dishes with its delicious nourishment, this recipe beckons you to taste the magic of homemade bread. Dive into this culinary experience and let the aroma of freshly baked bread elevate your day—trust me, your palate will thank you!
Print
Air Fryer Bread
- Prep Time: 15 minutes
- Cook Time: 30 minutes
- Total Time: 45 minutes
- Yield: 4 servings 1x
- Category: Bread
- Method: Air Frying
- Cuisine: American
- Diet: Vegetarian
Description
Delicious homemade bread made effortlessly in an air fryer, featuring a crunchy crust and soft, pillowy interior.
Ingredients
- 2 cups all-purpose flour
- 1 cup warm water
- 2 teaspoons yeast
- 1 teaspoon salt
- 1 tablespoon sugar
- 1 tablespoon olive oil
Instructions
- Combine the warm water, yeast, and sugar in a bowl. Let it sit for about 5-10 minutes until frothy.
- Mix the flour and salt in a large mixing bowl to ensure even distribution.
- Add the frothy yeast mixture and olive oil to the flour mixture. Stir until a dough forms.
- Knead the dough for about 5 minutes until smooth and elastic.
- Allow the dough to rest in a warm area for about 30 minutes, covered with a damp cloth.
- Shape the dough into a loaf, tucking edges underneath.
- Preheat your air fryer to 350°F (175°C).
- Place the dough in the air fryer basket and cook for about 25-30 minutes until golden brown.
- Remove from the air fryer and let it cool on a wire rack before slicing.
Notes
Let the dough rise properly for the best texture. Can be made ahead and refrigerated for a day before baking.
Nutrition
- Serving Size: 1 slice
- Calories: 120
- Sugar: 1g
- Sodium: 150mg
- Fat: 1.5g
- Saturated Fat: 0g
- Unsaturated Fat: 1.5g
- Trans Fat: 0g
- Carbohydrates: 22g
- Fiber: 1g
- Protein: 3g
- Cholesterol: 0mg