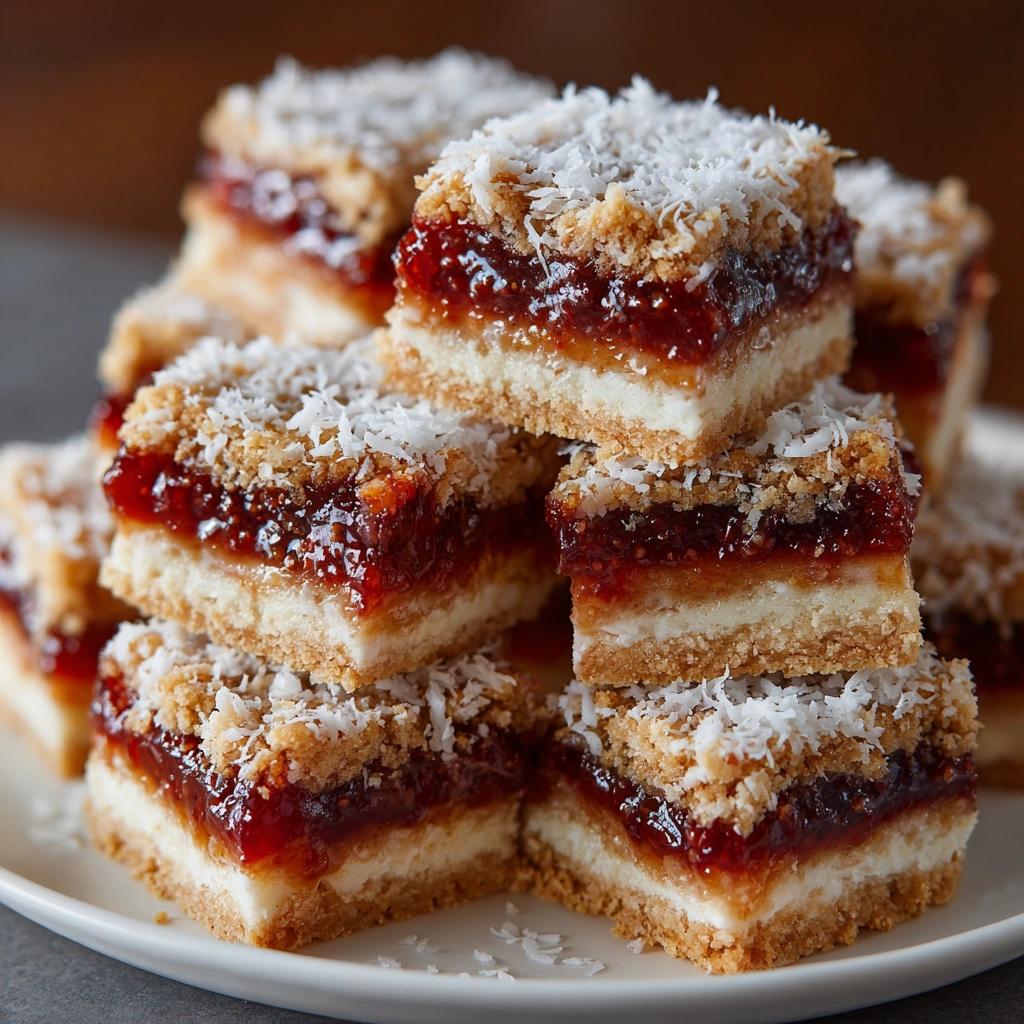
Introduction to Aussie Jam Slice
As a busy mom, I know how precious time can be, especially when it comes to whipping up something sweet for the family. That’s where the Aussie Jam Slice comes in! This delightful treat combines a buttery biscuit base with a luscious jam filling, making it a quick solution for those hectic days. Whether you’re looking to impress your loved ones or simply satisfy a sweet tooth, this easy recipe is sure to become a favorite. Trust me, once you try it, you’ll be reaching for seconds—and maybe even thirds!
Why You’ll Love This Aussie Jam Slice
This Aussie Jam Slice is not just a dessert; it’s a lifesaver! With its simple ingredients and quick prep time, you can have a delicious treat ready in no time. The buttery biscuit base paired with your favorite jam creates a flavor explosion that everyone will adore. Plus, it’s perfect for any occasion, whether it’s a family gathering or a cozy night in. You’ll love how easy it is to make and how quickly it disappears!
Ingredients for Aussie Jam Slice
Gathering the right ingredients is the first step to creating your Aussie Jam Slice masterpiece. Here’s what you’ll need:
- Plain biscuits: These form the base of your slice. You can use any type you like, from digestive biscuits to graham crackers. They add that delightful crunch!
- Unsalted butter: Melted butter brings richness and helps bind the biscuit crumbs together. It’s the secret to that buttery flavor.
- Sweet jam: Choose your favorite flavor! Raspberry, apricot, or strawberry all work beautifully. The jam adds a sweet, fruity layer that complements the base.
- Desiccated coconut: This ingredient adds texture and a hint of tropical flavor. If you’re not a fan, feel free to leave it out or substitute with crushed nuts.
- Sweetened condensed milk: This creamy ingredient helps to hold everything together and adds a touch of sweetness. It’s a game-changer for the overall texture!
For those who like to experiment, consider adding chopped nuts or chocolate chips to the base mixture for an extra twist. You can find the exact quantities for each ingredient at the bottom of the article, ready for printing!
How to Make Aussie Jam Slice
Now that you have your ingredients ready, let’s dive into the fun part—making the Aussie Jam Slice! Follow these simple steps, and you’ll have a delicious dessert in no time.
Step 1: Preheat the Oven
First things first, preheat your oven to 180°C (350°F). Preheating is crucial because it ensures even baking. If you skip this step, your slice might not cook properly, and nobody wants a gooey mess!
Step 2: Prepare the Biscuit Base
Next, grab those plain biscuits and crush them into fine crumbs. You can use a food processor or place them in a ziplock bag and smash them with a rolling pin. It’s a great way to relieve stress! Once crushed, transfer them to a mixing bowl.
Step 3: Combine Ingredients
Now, it’s time to mix! Pour the melted butter over the biscuit crumbs. Add the desiccated coconut and sweetened condensed milk. Stir everything together until it’s well combined. The mixture should be sticky and hold together nicely. This is the base of your Aussie Jam Slice!
Step 4: Press into Baking Dish
Take a greased baking dish and press the mixture evenly into the bottom. Use the back of a spoon or your hands to ensure it’s compact. This step is important because a well-pressed base will hold up better when you slice it later.
Step 5: Add the Jam Layer
Now for the fun part—spreading the jam! Choose your favorite flavor and dollop it over the biscuit base. Use a spatula to spread it evenly. Make sure to cover the entire surface for that sweet burst in every bite!
Step 6: Bake to Perfection
Pop your baking dish into the preheated oven and bake for 20-25 minutes. Keep an eye on it! You’ll know it’s done when the top is golden brown and the edges are slightly crisp. The aroma will fill your kitchen, making it hard to resist!
Step 7: Cool and Slice
Once baked, remove the dish from the oven and let it cool completely. This is the hardest part—waiting! Once cooled, slice it into squares. I recommend using a sharp knife for clean edges. Enjoy your Aussie Jam Slice with a cup of tea or coffee!
Tips for Success
- Make sure your butter is fully melted for a smooth mixture.
- Use a spatula to spread the jam evenly for consistent flavor in every bite.
- Let the slice cool completely before cutting to avoid crumbling.
- For a fun twist, try mixing in some chocolate chips or nuts!
- Store leftovers in an airtight container to keep them fresh.
Equipment Needed
- Baking dish: A square or rectangular dish works well. If you don’t have one, a pie dish can be a great alternative.
- Mixing bowl: Any large bowl will do. A sturdy plastic or glass bowl is perfect for mixing.
- Food processor or rolling pin: Use a food processor for quick biscuit crushing, or a rolling pin for a more hands-on approach.
- Spatula: A rubber spatula is ideal for spreading the jam evenly.
Variations of Aussie Jam Slice
- Nutty Delight: Add chopped almonds or walnuts to the biscuit base for a crunchy texture.
- Chocolate Lovers: Mix in chocolate chips or drizzle melted chocolate on top for an indulgent twist.
- Fruit Fusion: Swap out the jam for a layer of fresh fruit like sliced strawberries or peaches for a refreshing change.
- Gluten-Free Option: Use gluten-free biscuits to make this dessert suitable for those with dietary restrictions.
- Coconut-Free: If coconut isn’t your thing, simply omit it and replace it with crushed graham crackers for added crunch.
Serving Suggestions for Aussie Jam Slice
- Pair your Aussie Jam Slice with a dollop of whipped cream for a creamy contrast.
- Serve alongside a hot cup of tea or coffee to enhance the flavors.
- For a festive touch, dust with powdered sugar before serving.
- Garnish with fresh berries for a pop of color and freshness.
- Enjoy it as a delightful afternoon snack or dessert at gatherings!
FAQs about Aussie Jam Slice
As you embark on your journey to make the perfect Aussie Jam Slice, you might have a few questions. Here are some common queries that can help you along the way:
Can I use any type of jam for the Aussie Jam Slice?
Absolutely! You can use any jam flavor you love. Raspberry, apricot, or even mixed berry jam work wonderfully. The choice is yours!
How should I store the Aussie Jam Slice?
Store your slice in an airtight container at room temperature. It will stay fresh for up to a week. If you want to keep it longer, consider refrigerating it.
Can I freeze the Aussie Jam Slice?
Yes, you can freeze it! Just wrap the slices tightly in plastic wrap and place them in a freezer-safe container. They’ll be good for up to three months.
What can I serve with the Aussie Jam Slice?
This slice pairs beautifully with a cup of tea or coffee. You can also serve it with whipped cream or a scoop of vanilla ice cream for an extra treat!
Is the Aussie Jam Slice suitable for vegetarians?
Yes, this recipe is vegetarian-friendly! It contains no meat or animal-derived ingredients, making it a great option for those following a vegetarian diet.
Final Thoughts
Making the Aussie Jam Slice is more than just baking; it’s about creating sweet memories with your loved ones. The joy of pulling a golden-brown slice from the oven, the aroma wafting through your kitchen, and the smiles on your family’s faces as they take that first bite—priceless! This easy recipe is perfect for busy days, yet it feels special enough for celebrations. So, whether you’re enjoying it with a cup of tea or sharing it at a gathering, this delightful treat is sure to bring happiness to your home. Happy baking!
Print
Aussie Jam Slice: Discover This Easy, Delicious Recipe!
- Prep Time: 15 minutes
- Cook Time: 25 minutes
- Total Time: 40 minutes
- Yield: 16 squares 1x
- Category: Dessert
- Method: Baking
- Cuisine: Australian
- Diet: Vegetarian
Description
Aussie Jam Slice is a delightful and easy-to-make dessert that combines a buttery biscuit base with a sweet jam filling, perfect for any occasion.
Ingredients
- 250g plain biscuits
- 125g unsalted butter, melted
- 1 cup sweet jam (your choice of flavor)
- 1 cup desiccated coconut
- 1/2 cup sweetened condensed milk
Instructions
- Preheat your oven to 180°C (350°F).
- Crush the plain biscuits into fine crumbs.
- In a bowl, mix the crushed biscuits with melted butter, desiccated coconut, and sweetened condensed milk until well combined.
- Press the mixture into a greased baking dish evenly.
- Spread the jam over the biscuit base.
- Bake in the preheated oven for 20-25 minutes or until golden brown.
- Allow to cool before slicing into squares.
Notes
- Feel free to use any jam flavor you prefer.
- Store in an airtight container for up to a week.
- For a twist, add chopped nuts or chocolate chips to the base mixture.
Nutrition
- Serving Size: 1 square
- Calories: 150
- Sugar: 10g
- Sodium: 50mg
- Fat: 7g
- Saturated Fat: 4g
- Unsaturated Fat: 2g
- Trans Fat: 0g
- Carbohydrates: 20g
- Fiber: 1g
- Protein: 2g
- Cholesterol: 15mg