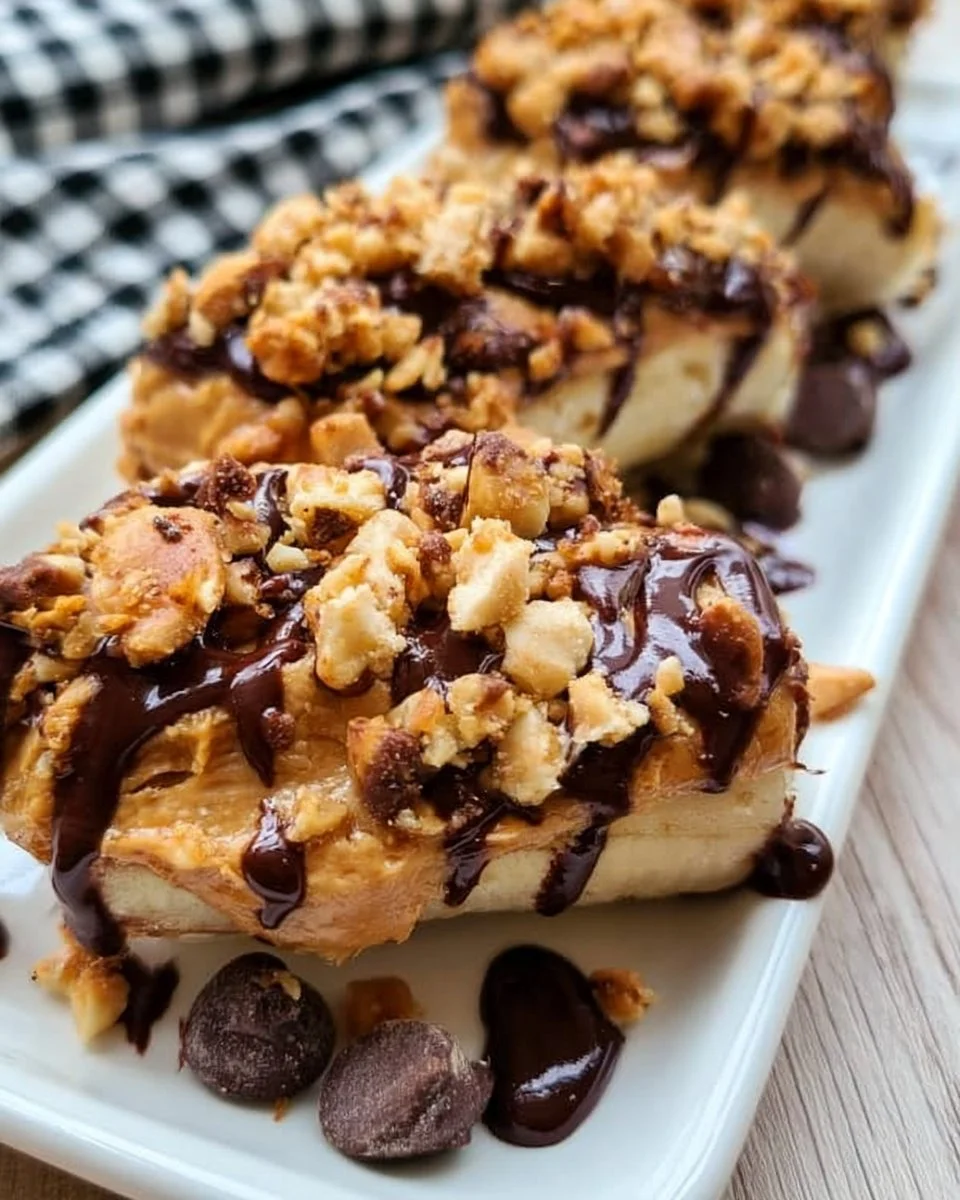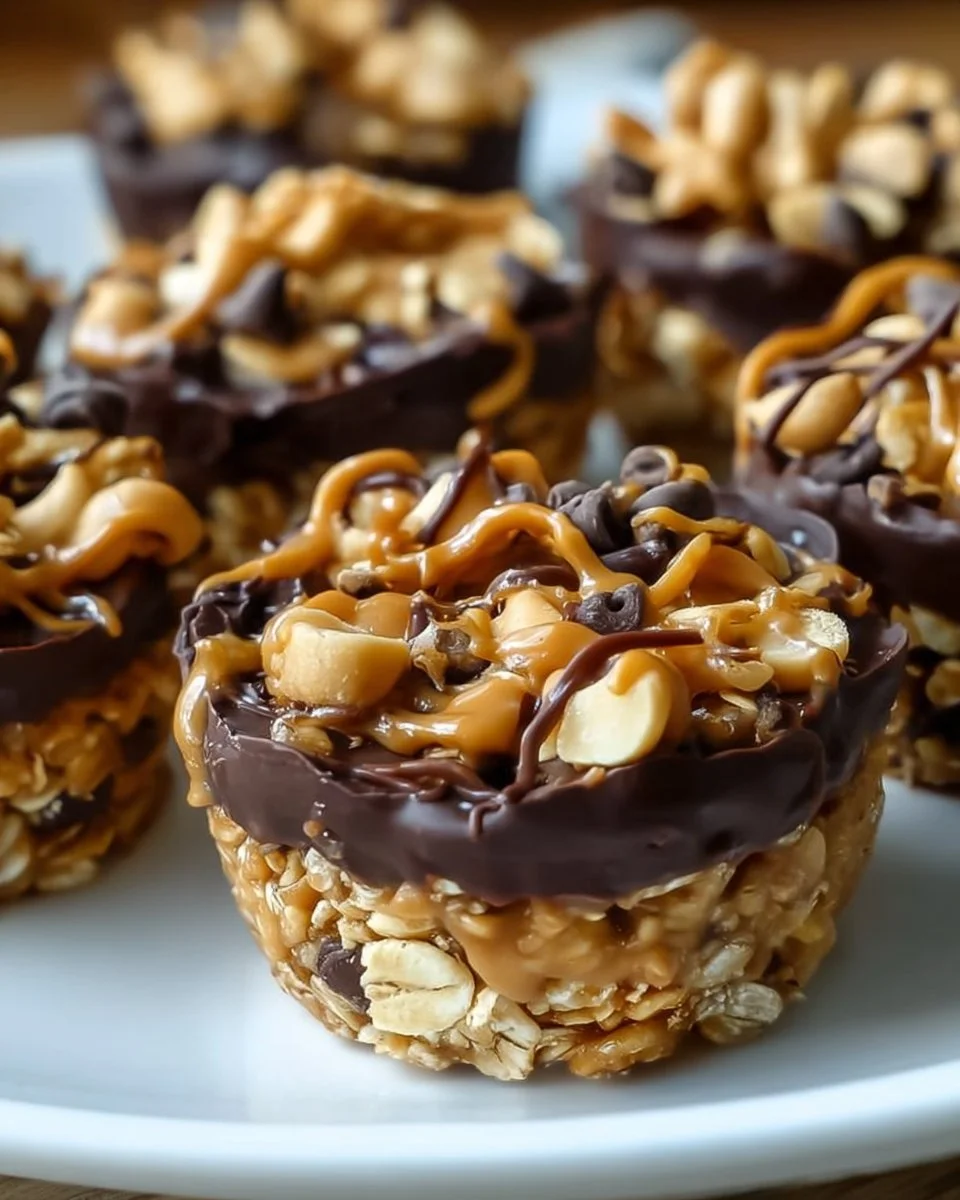
No bake Peanut Butter Granola Cups promise a delightful explosion of flavor and texture that dances on the palate and satisfies that sweet craving without a hint of guilt. Imagine biting into a cup that crumbles ever so slightly, giving way to a harmonious blend of crunchy granola and smooth, creamy peanut butter. As the aroma wafts through the kitchen, it entices everyone around, beckoning them to indulge in a wholesome treat. You’ll find the balance of rich peanuts and the delicate sweetness of honey or maple syrup creating an irresistible melody, complemented by the occasional burst of dark chocolate.
These little cups, so beautifully layered in a muffin form, become a delightful indulgence that can easily whisk you away to better days, perhaps a warm afternoon picnic or cozy movie nights. Their simplicity and delightful aspects make them perfect for every occasion, from a quick breakfast on busy mornings to an after-school snack that keeps your energy high. Each bite evokes both nostalgia and happiness, making these granola cups more than just food—they offer a moment of joy and comfort.
Why You’ll Love This No Bake Peanut Butter Granola Cups
You’ll find these No Bake Peanut Butter Granola Cups to be a revelation in snacking. They fuse nutrition and indulgence into one satisfying package that will leave you wanting more. Packed with wholesome ingredients, these cups supply an energy boost without the sugar crash. The delightful crunch from the granola paired with the creaminess of peanut butter and the sweetness of your choice between honey or maple syrup creates a flavor experience unlike any other.
Guests will adore these as a sweet treat during gatherings, while kids will clamor for them in their lunchboxes. Whether served at birthday parties, movie nights, or simply enjoyed as a midday snack, these cups will soon become a crowd favorite. They stand out not just for their taste but also for their wholesome goodness. Each ingredient contributes to a nourishing, gratifying experience, ensuring you can enjoy a delicious treat without the guilt.
Preparation Phase & Tools to Use
Before you begin whipping up these delightful cups, gather your tools to streamline the process.
- Large Mixing Bowl: A sturdy bowl lets you combine ingredients without splattering.
- Spatula: This tool is perfect for scraping down sides and ensuring every bit of peanut butter and sweetener blends well.
- Muffin Tin: Opt for a non-stick muffin tin or line it with muffin liners to prevent sticking.
- Refrigerator: A must for helping them firm up and develop their delightful texture.
Start by prepping your kitchen space. Take out all your ingredients and tools—organization makes the process so much easier. Choose a cozy spot where you feel inspired; cooking should feel like a joyful experience, not a chore.
Ingredients for No Bake Peanut Butter Granola Cups
- 2 cups granola: This staple creates the crunchy base. Feel free to choose your favorite variety—oat-based, nutty, or even gluten-free.
- 1 cup creamy peanut butter: Creaminess is key here! You might use almond butter or sunflower seed butter for a nut-free alternative.
- 1/4 cup honey or maple syrup: This natural sweetener binds the mixture together; both lend lovely flavors, but maple syrup offers a deeper, woodsy touch.
- 1/4 cup dark chocolate chips: The bittersweet chocolate elevates each bite. Opt for milk chocolate or even white chocolate if you prefer.
- 1 teaspoon vanilla extract: This warm, aromatic addition enhances overall flavor.
- Pinch of salt: Just a touch emphasizes the sweetness and rounds out the flavors beautifully.
These ingredients come together effortlessly, creating a treat that feels indulgent yet is nourishing and wholesome.
How to Make No Bake Peanut Butter Granola Cups
- Combine Ingredients: In a large mixing bowl, stir together the granola, peanut butter, honey (or maple syrup), vanilla extract, and salt until everything melds beautifully.
- Fold in Chocolate Chips: Gently incorporate the dark chocolate chips, ensuring they spread evenly throughout the mixture.
- Prepare the Muffin Tin: Line your muffin tin with muffin liners or lightly grease it with cooking spray to ensure easy removal.
- Fill the Cups: Scoop the mixture into prepared muffin cups, packing it down firmly for a solid structure.
- Chill: Refrigerate the filled muffin tin for at least 30 minutes, allowing the cups to set and harden slightly.
- Enjoy: Once firm, gently remove the cups from the muffin tin, and savor these delightful snacks at your leisure.
Chef’s Notes & Helpful Tips
- Make-Ahead: These cups store well, making them great for prepping in advance. Feel free to double the recipe if you anticipate more snacking.
- Cooking Alternatives: Although they are perfect without baking, you could warm the peanut butter slightly to make mixing more effortless. Avoid baking to preserve that no-bake charm.
- Customization: Mix it up by adding dried fruits like cranberries or apricots or by sprinkling in some seeds for an extra crunch and nutritional boost.
Common Mistakes to Avoid
Creating delicious No Bake Peanut Butter Granola Cups isn’t difficult, but a few missteps can hinder the result.
- Not Packing Down: If you don’t pack the mixture firmly into the muffin cups, they may crumble when removed. Press down with a spoon or your fingers for a tight fit.
- Skipping Refrigeration: Patience is essential! Failing to chill them adequately may lead to a messy snack experience. Remember, they need time to firm up.
- Using Too Much Sweetener: Adjust your sweetener based on your granola’s sweetness. Too much can make the cups overly sticky and unmanageable.
What to Serve With No Bake Peanut Butter Granola Cups
These delightful cups are tasty on their own but pairing them with other foods creates an even more satisfying experience. Try serving them with:
- Fresh Fruit: A side of sliced bananas or crisp apples balances the richness of the peanut butter.
- Greek Yogurt: Serve them alongside a bowl of creamy Greek yogurt topped with berries for an energizing breakfast.
- Chocolate Milk: A glass of rich chocolate milk complements the chocolate chips remarkably well.
- Smoothies: Pair these cups with your favorite smoothie for a balanced snack or breakfast.
- Nut Milk: Almond or cashew milk makes for a truly comforting beverage alongside these cups.
- Trail Mix: Make a DIY trail mix using nuts and seeds to amplify the crunch factor.
- Coffee or Tea: Enjoy these cups with a warm cup of coffee or herbal tea for a cozy treat.
Storage & Reheating Instructions
These No Bake Peanut Butter Granola Cups store wonderfully. Simply keep them in an airtight container in the refrigerator for up to a week. If you wish to prolong their lifespan, freeze them for up to three months. To reheat, you can either enjoy them cold from the fridge or let them sit at room temperature for a few minutes before indulging—no actual reheating is needed here!
Estimated Nutrition Information
Each serving holds approximately:
- Calories: 150
- Total Fat: 8g
- Carbohydrates: 18g
- Dietary Fiber: 2g
- Sugars: 6g
- Protein: 4g
Disclaimer: Nutritional values may vary based on specific ingredients used.
FAQs
Can I use crunchy peanut butter instead of creamy?
Absolutely! Crunchy peanut butter adds an exciting texture. Just be aware that it may affect the binding slightly, so you may need to adjust the quantities a bit.
Can I make these vegan?
Yes! Replace the honey with maple syrup and ensure your chocolate chips are dairy-free.
How can I make these gluten-free?
Look for certified gluten-free granola, as many varieties contain gluten.
Can I add protein powder?
Certainly! Incorporate a scoop or two for an added protein boost. Just reduce the amount of granola slightly to maintain balance.
What is the best way to package these for gifts?
Wrap them in clear cellophane bags tied with a ribbon or place them in a decorative tin. They make lovely homemade gifts!
Conclusion
The joy of crafting No Bake Peanut Butter Granola Cups lies not only in the delicious flavors that burst with each bite but also in the wonderful moments they bring to your life—whether shared with friends, family, or enjoyed quietly with a cup of tea after a long day. Their simplicity, versatility, and wholesome goodness encourage you to dive into this easy yet rewarding recipe. Get into your kitchen today and let the aromas, textures, and flavors of these delightful granola cups enchant you and everyone lucky enough to taste them!
Print
No Bake Peanut Butter Granola Cups
- Prep Time: 15 minutes
- Cook Time: 0 minutes
- Total Time: 45 minutes
- Yield: 12 servings 1x
- Category: Snack
- Method: No-Bake
- Cuisine: American
- Diet: Gluten-Free, Vegetarian
Description
Delightful granola cups filled with crunchy granola, creamy peanut butter, and a hint of sweetness, perfect for snacks or breakfast.
Ingredients
- 2 cups granola
- 1 cup creamy peanut butter
- 1/4 cup honey or maple syrup
- 1/4 cup dark chocolate chips
- 1 teaspoon vanilla extract
- Pinch of salt
Instructions
- Combine ingredients: In a large mixing bowl, stir together the granola, peanut butter, honey (or maple syrup), vanilla extract, and salt until everything melds beautifully.
- Fold in chocolate chips: Gently incorporate the dark chocolate chips, ensuring they spread evenly throughout the mixture.
- Prepare the muffin tin: Line your muffin tin with muffin liners or lightly grease it with cooking spray to ensure easy removal.
- Fill the cups: Scoop the mixture into prepared muffin cups, packing it down firmly for a solid structure.
- Chill: Refrigerate the filled muffin tin for at least 30 minutes, allowing the cups to set and harden slightly.
- Enjoy: Once firm, gently remove the cups from the muffin tin, and savor these delightful snacks at your leisure.
Notes
These cups store well in an airtight container in the refrigerator for up to a week or frozen for up to three months. Great for meal prep!
Nutrition
- Serving Size: 1 cup
- Calories: 150
- Sugar: 6g
- Sodium: 80mg
- Fat: 8g
- Saturated Fat: 1g
- Unsaturated Fat: 7g
- Trans Fat: 0g
- Carbohydrates: 18g
- Fiber: 2g
- Protein: 4g
- Cholesterol: 0mg